Thursday 31 October 2013

Baltic herring, three ways to make a Finnish ingredient taste like Spanish!

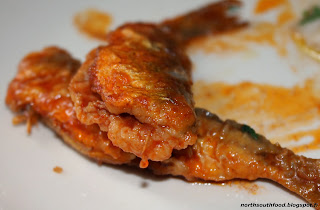
The star of today post is Baltic herring (Clupea harengus membras). We found a really nice, fresh and cheap Baltic herring in the market and couldn't resist to perform a fusion of Finnish and Spanish cooking!


We bought so much of herring that we even had to think hard what to do with such amount!! I think buying nice, fresh and season fish is the best investment you can do, we even cleaned and froze bunch of the herring as to eat some other day. 

All the members of the clupeidae family are known to be really healthy, rich in vitamins and Omega 3 oils and furthermore so easy to prepare and delicious!

So the three ways of cooking the Baltic herring today are: fried, in "escabeche" and with vinegar.

But first of all the cleaning, because Baltic herring is small, this takes no time and no tools whatsoever but your hands!! the procedure is simple, rip the head off and with the finger hook the guts out of the body. Abundant cold water to rinse it after and that's it! For removing the spine just requires a bit of technique, try to separate both files with your thumbs and then break the spine by the end and pull it out.

Fried

Fried or "a la romana" as we call it in Catalonia is a cooking technique that consist in dipping in flour and then in battered egg to the pan with a bit of olive oil, it is not deep frying.
In Spain, in south mostly, they just dip it in flour and then deep fry it, but we are not going to do it this way.

Ingredients

  • Baltic herring (or whichever fish you want, you can use cod, bass, hake, any white meat fish is suitable)
  • eggs
  • plain flour
  • olive oil
  • salt
The procedure is simple, salt the fish, dip it in flour, as to get an uniform layer and then dip it in the battered egg. Drain the excess egg before moving the fish to the hot pan with a bit of olive oil. Before serving, place the cooked fish in an absorbent paper, as to drain the excess oil.

In escabeche

This technique, allows to cook almost any fish or white meat (chicken, pork, rabbit, etc) and be in good condition to eat for 4-5 days when kept in the fridge, and 3,4, 5 or even 6 months when vacuum sealed in a glass jar.
You can use this technique for almost anything, from tuna to hare or pheasants.
For the long conservation technique changes a bit from this one I'm using. If you check the link above from wikipedia, you can see what escabeche means, and now going to explain how to prepare it.
The way described is common to be used for preparing sardines.

Ingredients

  • Baltic herring (with the spine, we didn't remove it)
  • Garlic
  • Wine vinegar 
  • Pimenton dulce (Spanish non spicy paprika)
  • Dried rosemary
  • Laurel
  • Olive oil
  • Regular flour
The preparation start with sprinkling a bit of salt and flour in the herring and frying it in olive oil till it changes colour.
After all the herring is cooked, in the same pan, add few tbsp of olive oil as well as fine slices of garlic. Now start the critic part, so better have everything ready because you have to be fast or will burn the next ingredients!!
Add little bit of dried rosemary, a broke leave of laurel, a tbsp of pimenton dulce give it a super quick mix and right after the vinegar. Normally I add 1dl of wine vinegar and little bit less of water. Quick mix and drop the sauce to the tray where you have the fried herring. Leave one night in the fridge and next day is good to eat!

In vinegar

preparing fish in vinegar is really typical from Spain, the most common of which is the "boquerones en vinagre". Boquerones (Engraulis encrasicolus) is a small fish, from the family of the herring, so that's why we decided to try with herring to see the result.
This technique, allows you to keep the fish good for eating in a fridge for around 4 to 6 days.

Ingredients

  • Baltic herring
  • Wine vinegar
  • Olive oil
  • Garlic
  • Parsley
We start with the clean herring, without spine, we put them in a tray with salty water for 30 min, the saltiness has to be around sea level.

After that we remove the water, and add vinegar to the tray with the herring, as to cover it, it is important to know the marinating time. A mixture of vinegar and water will take longer, but there is less risk to have too much vinegar taste in the end, I certainly recommend it like this.
I used half water, half vinegar, and for our herring took around 2-2.5 hours to be properly marinated. You can see the files have changed colour to a nice white colour, you have to keep in mind that the whole file is properly marinated, you don't want the inner part to be raw.

Drain the vinegar away, if there is a bit left it is ok, but most has to go away, and chop garlic and parsley and sprinkle in top of the herring and finish with a good amount of olive oil. Leave it overnight in the fridge so the fish has the time to finish marinating with the olive oil, garlic and parsley.

Hope you like this 3 recipes! 


Sunday 27 October 2013

Blinis

Blinis are a typical Russian/Slavic dish, Finland, being so close to the mighty Russia, has adopted blinis in its cooking and it is not unusual to find them as an appetiser all over Finland.
For cooking the blinis, there is a special pan, but if you don't have it, a small pan will do.
Big blini pan


Ingredients
  • 2 eggs
  • 5dl milk
  • 20g fresh yeast
  • 2,5 dl buckwheat flour
  • 1-2 dl plain flour
  • 2 tbsp butter
For the filling
  • Smetana
  • Salmon roe
  • Red Onion
  • Pickles
Preparation

Heat the milk to be little bit over room temperature (around 35-40ºC), dissolve the yeast into the milk. Separate egg whites from the yolks, add the yolks to the milk as well as both flours and melted butter and a pinch of salt. Stir it quickly and cover with a clean cloth and let it rest for 30 min.
Whip the egg whites and add them to the batter just before cooking and after the 30min have passed.

Add a bit of butter to the blini pan and pour a scoopful of batter, turn the blini when small bubbles appear to the surface.

For the filling, whip the smetana until thick and creamy, chop onion in small dices, cut the pickles and serve each ingredient in small dishes so everyone can make its own blini.

If you don't like salmon roe, you can use seaweed caviar, or finely chopped ciboulette instead of onions, etc 
The blinis are a great base as to make a nice starter and you can put whatever you might imagine!


Friday 25 October 2013

Mushroom soup with smoked reindeer and potato bread

Today comes the first recipe with reindeer, probably the most famous animal in Finland, for those who don't know much about this animal, here comes few facts:
  • It is mostly grown in Lapland, in a sort of semi-wild fatten
  • It is quite expensive, fresh is around 60-80€ kilo, frozen starting from 40€ kilo but you can find reindeer frozen minced meat for 10-20€ kilo (don't bother to buy it, it is disappointing)
Although today reindeer is not the main part of the dish, it gives a nice touch. So for this soup you can use fresh mushrooms as we did, or dried, if you use the dried normally takes 30-60 min to rehydrate the mushrooms with slightly hot water. 
As a nice side dish for this soup we cooked a potato flat bread, a really useful way to not waste that little bit of boiled or mashed potatoes that always are left behind.
This serving is for 6-8 people.

Ingredients
  • 500gr of mushrooms, we used suppis
  • onion
  • 2tbsp butter
  • 3tbsp regular flour
  • 3dl vegetables broth
  • 2dl cooking cream
  • 75g finely chopped cold-smoked reindeer 
 For the potato bread
  • 1kg potatoes
  • 2 eggs
  • 2,5 dl regular flour

Preparation 
Chop the onion in small pieces and saute it with butter for 5-10 min, add the chopped mushroom and let boil the excess water. sprinkle the flour with the help of a strainer and add the vegetable broth.
Let it boil for 10 min and then add the cream, let it cook 5 min and season at your desire.
Here you have a choise, if you don't like to find the little mushroom pieces, a blender and a stainer will make it a smooth soup.
Chop the cold-smoked reindeer and add it before serving.
For the potato bread, if you have already mashed potatoes skip till point 2
  1. Peel, cut and boil the potatoes as for making mashed potatoes. Once soft, smash the potatoes and add a bit of milk to have an homogeneous mixture.
  2. Add eggs and regular flour and mix it together, work the dough and make balls and flat them, use the barley flour to prevent the dough to stick.
  3. Place the flat dough on a baking sheet and cook at 230ºC for 10-15 min until it gets a nice brown colour.
 Enjoy it!


Friday 18 October 2013

Beetroot and barley casserole

Hei!

yesterday we attended a Finnish typical food masterclass, it was amazing!! We could discover so many new ingredients and one of the recipes we liked best was this one, for the simplicity, and for using totally new ingredients!

Ingredients:
- 1/2 kg beetroots
- onion
- 2 dl barley
- vegetables stock
- butter
- garlic

For the barley, we used this broken one, the result feels like a thicker couscous.


As we said, the recipe is really easy, it takes a bit of time though.

Wash the beetroots and peel them, cut it in small cubes, fine chop the onion and the garlic. Add a knob of butter to the casserole and add the beetroot, onion and garlic, saute for 5-10 min, season with salt and pepper.
Add the barley and the stock, let it simmer under the lid for an hour or so, we added 1 liter, it need a bit more. The time of cooking might be different, the barely doesn't take more than 15-20 min of cooking, but the beetroot need longer cooking time. We added a bit of timjami as decoration.


Tuesday 8 October 2013

Mushroom season

Autumn, one of my preferred time of the year...mostly because of mushrooms!!

Here in Finland, we have the luck of having so immense forests 30 min from downtown, where you can find so much mushrooms.

We have gone couple of times so far and we have found around 10 liters of "suppis" (Cantharellus tubaeformis) and few chanterelle (Cantharellus cibarius). There are many recipes involving mushrooms, but today we are here for explaining how to preserve them.


  • Freezing
For freezing you need to cook them slightly, so they drop a bit of their inner water, after that you can put them in freezing bags and straight to freezer, it is pretty simple and easy.

  • Drying
 It is the slowest and harder method, we tried the oven method (we don't have a food drier, you can improvise something like that, but we couldn't) but didn't work, the mushroom burned because the lower setting of the oven was to high.
We tried the slow method; for that you need a lots of space and lots of newspapers. For that you have to cover the table or wherever you are gonna use for drying with newspapers and spread the mushrooms. Try that they don't touch between each other. Every day turn them around and change the newspapers (mostly the first days, later might not be necessary) after 4 to 6 days, depending on room and humidity you will have them dried.


EDIT:

As later we found out, not all the mushrooms we picked are Cantharellus tubaeformis, but as well we picked some Craterellus lutescens.
They are slightly different, and the most important, EDIBLE!! This reminds that even though you know what you are looking for, you have to be carefull and focused when picking mushrooms.

Thursday 3 October 2013

Super fast rasbperry chessecake!

We have updated the blog layout and updated the camera, we did use our mobile phones, a lumia 900 and a samsung galaxy S3 mini, which cameras are ok. But from now on we will use a Canon 1100D.
As to give it a try, we did a super easy 5 min dessert, here are the ingredients:

- liquid cream 2dl
- spoon of mascarpone or philadelphia cream cheese
- 1tbsp of maple syrup
- berries (we used raspberries)
- digestive cookies

Whip the cream as it is ready, add the mascarpone and the maple syrup and whip it again.
Put the cookies in a tray, or as we did into a nice wooden table, and add the mixture and top with the berries. For decoration you can use honey or sugar powder. That's it!!

By the way, sharing a thought...why everything taste better with raspberries?!


Tuesday 1 October 2013

Beans!!

We love beans!! they are so forgotten always and underrated but you have an amazing varieties and ways to cook it. We are going to show how to cook, the big beans, the ones which need to be let overnight in water, easy recipe, it is slow cooking, but you can do meanwhile whatever you want, just check every 30min everything goes as planned and you end up with an amazing food.

So which are this beans we pick today? in Spain they are called judion, fabes, judia de la granja depending which region of Spain you buy them. This beans are big (almost 2 cm long, white and flat).

We followed the package instructions, leaving them soaking in cold water for 10-12 h.


Before and after, you have to remove the water and put them to pot to boil, with some salt, pepper, laurel, and then few vegetables, we had carrot and onions. Of course you can add which ever vegetable you find, they will taste better. Of course the more the better. 
Following the package instructions once they start boiling, add little bit of cold water, to break the boiling, do it three times. This is believed to avoid the peel to detach from the bean.

The package said to boil for 1,5h, but try it, we had to boil it for a bit longer.

For the sauce it is really basic, fry a bit of onion and garlic

Once the beans are ready, throw the water away, but save a bit for the sauce, take apart the vegetables too. Once the onion and garlic is getting done, add some roasted red pepper, if you have it fresh or canned, both are awesome. Just let it fry for couple of minutes because the red peppers are cooked already, and add little bit of flour, like a flat spoon.


Cook the flour for few minutes, otherwise the sauce will taste like flour. With the vegetables you can put it to the blender with some parsley and little bit of tomato pure.


Add everything, the sauce, the beans and little bit of the water from the boiling the beans


Let them cook for 5 - 10 min and enjoy it!